For my third look using Aromaleigh's limited edition collection "Astronomical," I decided to do a quintessential gradated neutral eye. And to show you how I accomplished this look, I took a photo after every step of my application process. For those of you who are new to makeup or those who are looking for an application technique that might be different from what you usually do, I hope you find this photo tutorial helpful. In the future, I might attempt a video tutorial but I'm not making any promises. ;)
Color Descriptions:
Neutrino (Astronomical) - borealis twinkles in a base of warm milk-chocolatey brown plush
Ephemeris (Astronomical) - semi-metallic cool taupe exhibits pinky-gold highlight and aurora borealis twinkles
Milky Way (Astronomical) - cream-coloured velvet adorned w/soft golden highlight and subtle blue glimmer
Oyster (Carolina Summer Matte) - matte pale cream/yellow
Umber (Pure Eyes Matte) - matte deepest brown
What I used on the rest of my face. . .
Foundation - Meow Flawless Feline in Frisky Manx (this is a little light for me but I wanted to use up some samples I had)
Finishing Powder - Aromaleigh Ultra Resolution Finishing Powder in Clear
Cheeks - Aromaleigh Perle Powders in Incandesce on cheekbones and Whisper on apples
Lips - Aromaleigh Shortcake
Lashes - Covergirl Professional WP mascara in Very Black
1. Prior to beginning my eyeshadow application, I apply my moisturizing sunscreen and let it soak in. Then I apply my mineral foundation. After that, I start off all of my eyeshadow looks with a very light application of Aromaleigh's shadow base in medium. A little of this base goes a very long way so (like with most shadow primers). All you have to do is lightly pat-pat-pat your ring finger into the container a few times and then lightly pat-pat-pat again all over your eyelid from lashes to brows. This step is a must for applying loose mineral powder shadows so they will stick to your skin well and last all day.
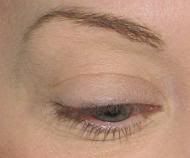
2. Apply Neutrino to outer corner and slightly into the crease using a back and forth motion making the shape of a filled in "v." If you hear people talking about the "outer v," this is what they are referring to. I used a pointed silk fiber brush for this step.
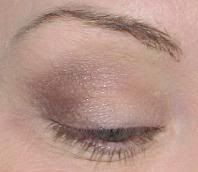
3. Apply Ephemeris to lid in a patting motion slightly overlapping the crease color. I used Target's large shadow brush for this step.
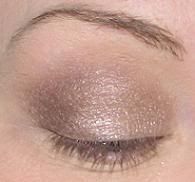
4. Apply Milky Way to inner corner of lid overlapping slightly into the lid color. I used a crease/shader brush from ecoTools for this step.
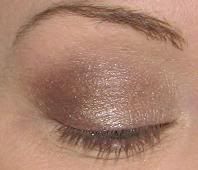
5. Apply Oyster all over the area between crease and brows. I used the same brush from step #3.
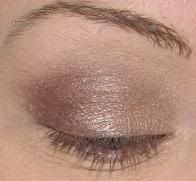
6. For this step, I used a thin liner brush dipped in water and then into Umber and lined the entire upper lash line winging out slightly at the outer corner. I used my ring finger to slightly smudge the edge of the liner closest to the inner corner to soften.
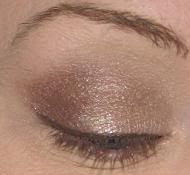
7. In this photo, I added a brown gel liner 3/4 of the way underneath my lower lashes using the same thin liner brush that I used in step #6 and I softened it using a natural hair smudger brush. I curled my lashes and added some brow powder and mascara. I cleaned up any loose mineral eyeshadow that happened to fall underneath my eyes or in my cheek area using a flocked sponge dipped in my mineral foundation. After that, I applied my blush and lipstick.


Photos are unretouched.


Click here to view a post about my favorite brushes.
* Aromaleigh Astronomical eyeshadow descriptions courtesy of Tanya at Easily Distracted blog.


