Showing posts with label birds. Show all posts

Wednesday, March 16, 2011

Inspiration. . .

Hi Nesters,

Here are a few things I've come across lately that I either want or just simply appreciate.  Enjoy!

Photobucket
Pottery Barn

Photobucket
Pottery Barn


Photobucket
Blueyedgirl on Etsy


Photobucket
Heartfeltgiver on Etsy


Photobucket
Pottery Barn

Photobucket
Pottery Barn

Photobucket
MamaTita on Etsy


Photobucket
Rainbowswirlz on Etsy


Photobucket

Wednesday, January 26, 2011

A silver robin's nest

Photobucket

My friend Lyndsey made this beautiful robin's nest pendant for me with her very talented hands (and she's not even a jewelry maker by profession). The gift was a surprise and arrived in the mail this past Christmas Eve. It's so sweet and I simply love it.

Click here to read more about Lyndsey and how we met.

Photobucket

Sunday, January 23, 2011

Wall art project part II (and a tutorial)

Hi Nesters,

Here's the second part of the wall art project I worked on last weekend. If you missed it, here's part I (Deconstructed Wall Art). I'm showing you the reveal first because I know you'll just scroll down to the bottom before you finish reading this post anyway. ;)

If you're interested in how I did this project, check out the rest of the post...I've given you a little tutorial.

Decoupaged initials and bird, egg and bird cage graphics adorn our family room wall (cause you know I love me some "bird" stuff)
Photobucket

"R" for Robyn (that's me)

Photobucket

"J" for Jason (my husband)

Photobucket

Vintage bird cage graphic

Photobucket

Vintage birds nesting graphic

Photobucket

Vintage bird eggs graphic

Photobucket

Before: A similar picture to the one you see here on the left was hanging on right side of the mirror. I don't have a before photo of them all together, but you get the idea.

Photobucket

After

Photobucket

Tutorial:

I started out with MDF (medium density fiberboard) letters that were painted white from the craft store. They had a hanging hole already drilled in the back but they didn't hang straight so I used 3M foam adhesive squares.

Photobucket

Photobucket

Photobucket

  • I painted each letter (top and sides) with soft black acrylic craft paint
  • Then I affixed scrapbook paper to the top of each letter using Mod Podge (I did not top coat it yet)
  • I used sandpaper to remove the excess paper and give the edges a timeworn look
  • I added paper embellishments to each letter (words, pictures, scrabble tiles, etc.)
  • I covered the entire project with a coat of Mod Podge to seal it
  • For the graphic prints, I went to The Graphics Fairy and downloaded them (for FREE!) and printed them in the sizes I needed onto card stock. I then shopped my closets and found some frames I wasn't using. One of the smaller ones was antique gold so I gave it a quick coat of the soft black acrylic craft paint and then roughed up the edges to give it a vintage-y feel.
More photos of the painting process and adding the decorative paper using the letter "B" from my previous wall project as as example:

Photobucket

Photobucket

Photobucket

Photobucket

Again, the final result!

Photobucket

Photobucket

Thanks for checking our my latest home project. If you enjoyed this post, please add yourself as a follower ("Nester").


Photobucket


I'm sharing this project at:


A Little Knick Knack
Follow my blog with bloglovin

Thursday, January 13, 2011

Glass cloche bird's nest project & tutorial

Hi Nesters!

This isn't an original idea but being a lover of nature (especially birds) it's something I've wanted to do for a while now. Glass cloches can be very expensive so I decided to make my own.

I found a small (about 6" tall) hurricane candle holder at Home Goods on clearance ($3.00).


Photobucket


I had a bunch of vintage-looking glass knobs ($0.00) left over from a shabby chic dresser project I did years ago (I'll show you that project in a future post). I used some E6000 adhesive to affix the knob to the bottom (which is now the top of the cloche) of the hurricane lamp.


Photobucket

Photobucket


I purchased a tiny faux bird's nest ($1.99) and a packet of faux eggs ($1.99) from the craft store. The nest was a little big to fit under the cloche so I trimmed away some of the outer twigs.


Photobucket


I printed up a bird graphic from The Graphics Fairy, one of my new favorite blogs (and she even lets you print them out for FREE!), and inserted it under the cloche behind the bird's nest. I got the idea from The Graphics Fairy as well.

I had hoped to use a robin bird graphic but couldn't find one in a horizontal composition. I printed this one out but it didn't work under the cloche since the egg in the photo got hidden by the nest. But it was so pretty I couldn't throw it away. I ended up sticking it in a scrolly iron wall art I have hanging above my desk, which happens to be on an adjoining wall just to right of my fireplace.


Photobucket


The finished project. It's so sweet. I'm thrilled with how it turned out. . .and all for under $10!


Photobucket

Photobucket


A Little Knick Knack
Linking to: Thrifty Thursday at Tales from Bloggeritaville

Photobucket

Thursday, January 6, 2011

Goals for my nest in 2011

I didn't need someone to challenge me to come up with a list of things I want to do around the house this coming year (there's always something that needs to be done), but The Nester (thenester.com) happened to post such a challenge on her blog recently so I thought it was a good excuse to actually get all of it written down. That is the first step to getting things done after all. . .make a list. I won't promise myself that all of the projects listed here will get done. But I'm optimistic and hopeful that I'll get through quite a lot of them.

So here's my list (in no particular order) of things I hope to accomplish myself (or with minimal help from my husband) around the house in the year 2011.


  • Repaint the kitchen.

    Photobucket


    Photobucket


    Photobucket
  • Repaint the breakfast room.

    Photobucket

  • Repaint the family room.
  • Repaint the media room. (aka Daddy's room)
  • Repaint the hallway.

    Photobucket
  • Repaint the foyer. The aforementioned 5 rooms/areas are all currently painted the same color ("Warm Oats" by Easy Living). It's not that I don't like the current color, but after a few years of hanging/rehanging photos and artwork in different places, and just general wear and tear, it's time for for new paint. I'm not sure if I'll repaint the same color or go for something different. If I decide on a different color, I'm still leaning toward a similar beige tone but perhaps with a little less yellow in it. Maybe more in the taupe family. We'll see.
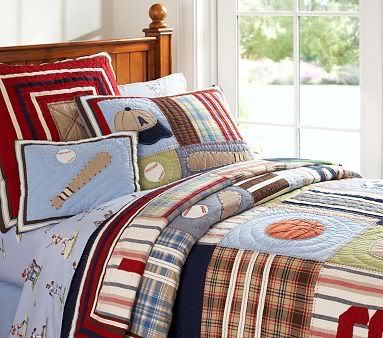
  • Repaint son's bedroom. It's currently a pale blue ("Igloo" by Dutch Boy) and we're planning on removing all of his sports wallpaper stick-ons and painting it either a soft beige or a mid-tone denim blue (picking up one of the colors in his quilt).

    (Sorry for the bad pics. Not a bit of sunshine to be had this week.)
Photobucket


Photobucket


  • Repaint all doors, door jams and baseboards. In a perfect world, I would like to actually replace all of the doors but that's not in the budget right now.
  • Install new cabinet/drawer fronts and hardware in the kitchen and breakfast room. I got an estimate on what it would cost to have all new cabinets installed (not even changing the floor plan at all) and it was a little over $6k for just 18 linear feet of upper and lower cabinets. That doesn't even include the bank of cabinets I have along with breakfast room wall. I decided that I can live without new cabinets but will just purchase stock cabinet/drawer fronts, paint them myself and install new hardware. When we purchased our home, the cabinets were the original mid-tone brown varnish with antique gold knobs. I primed and painted the cabinets white and added chrome/porcelain hardware (30 cabinets/drawers in all).
  • Paint oven door, paint cook top and replace hood vent. Since our house was built in 1966, they don't make replacement wall ovens and cook tops in the size I need. I would have to make modifications to the existing counters and cabinetry and that's something I really don't want to deal with. Although our oven, cook top and hood vent are original, they are in great working condition and very clean. They are also very brown. So I think a fresh coat of "appliance white" paint will freshen them up nicely.
  • Install new flooring in main bathroom. When we moved in, the main bathroom was decorated in 1980's peach and gray, including coordinating peel & stick tiles. So in an effort to provide a quick inexpensive fix, I ripped out the old tiles and installed new "not quite so hideous" faux marble peel & stick tiles. After all these years they are still in good condition, but vinyl tiles don't really appeal to my design aesthetic so it's time for a new floor. I'm not sure what kind of floor I want to install but it needs to be DIY friendly. I'm thinking about doing a self-leveling concrete floor and then staining it. If you've tried this technique before, please post a comment here and give me some pointers.
  • Touch-up paint on exterior of house. Our house is part stucco and part wood. The wood part is up near the eaves and has weathered some over the last couple of years since it was last painted by a professional. That person didn't use a primer and it shows. Once the weather warms up in the spring, this is the first job I want to tackle (or have hubby tackle).
  • Replace or paint existing flush-mount lights in kitchen. When we moved in, the kitchen had the original builder's grade light fixtures from the 60's. I replaced them with generic white frosted flush-mount fixtures. Nothing fancy because I didn't want them to stand out. But I think now I'm ready to show a little more personality. If I don't find anything affordable that really jumps out at me, I'll just repaint the white trim on the existing fixtures with a dark bronze paint.
Well, that's it for now. I'm sure I can come up with several other things that need to be done but they'll have to wait for next year's list.
If you would like to see what the rest of the rooms look like, go here to view all of my blog posts that include photos of our home.
Photobucket
Related Posts Plugin for WordPress, Blogger...

NO STEALING ZONE. . .

NO STEALING ZONE. . .
I like to share, but please don't use my blog content (pictures, text, anything) without asking permission. Thank you!